Thursday, November 28, 2013

Korean Scallion Pancakes

HAPPY THANKSGIVING EVERYONE!

I know you all are eating your hearts out this Thanksgiving: green bean casserole, roasted sweet potatoes, turkey. cranberry sauce, stuffing, and galore!! My family is eating barbecue for some odd reason but I am still insanely jealous that I'm missing out.

Instead my Thanksgiving breakfast consisted of Korean Scallion Pancakes!! I know. I clearly am a couple holidays off. I woke up this morning craving Green Onion (aka Scallion) pancakes because last night I read an article about 40 Taiwanese foods we can't live without. I must have dreamt about them because they clearly were still on my mind when I woke up. If you are up for some serious drooling check out the article to educate yourself on some of the most popular Taiwanese foods.


So I hopped out of bed and started looking up recipes on how to make them. The traditional Taiwanese flaky scallion pancake requires that the dough sits for 30-60 minutes before you can even make the pancakes. AND there's this super fancy technique to roll them out for which a rolling pin is necessary. I don't have a rolling pin and my tummy was not going to wait this long, so I settled for Korean scallion pancakes!

They turned out just fine and satisfied my craving. Texture wise these pancakes are more dense and not flaky in comparison to the Taiwanese scallion pancakes. However, there is a nice crust on the outside from searing it in the pan, you get the nice brown toasty color, and the flavor of the green onion really shines.

So if your Thanksgiving is just as wacky as mine food-wise, try em out! The recipe required a few basic ingredients, required minimal prep work, and most importantly, I GOBBLED them all up :)

Also, the bottom of this pancake got a little TOO toasty, but doesn't it look like a rose? It was too pretty to not share. (Or I'm crazy and the only person who thinks this looks like a flower.)


Korean Scallion Pancake (Pa Jun)

Recipe from Naomi Imatome-Yun 
Serving Size: 5 medium pancakes


2 cups flour
2 eggs, beaten
1 1/2 cups water
1 bunch of scallions
1 tsp salt
Oil for cooking
Soy Sauce (for dipping)


1. Finely chop the bunch of scallions and mix them together with the flour, eggs, water and salt. Let sit for about 10 minutes and consistency should be runnier than American pancake batter.

2. Heat a saute pan over medium heat and coat with a thin layer of oil.

3. Pour batter to fill pan in a thin layer.

4. Cook for 3-4 minutes until set and golden brown on bottom.

5. Turn over with help of spatula and cook for an additional 2 minutes. Add more oil if necessary, and desired color should be a toasted brown.

6. Serve warm and dip in soy sauce!

Sunday, November 3, 2013

Apple Baskets

You know a little while back when I promised that I would have a series of apple dessert recipes for you? Well, I finally came through.

When I made my turnovers I had too much leftover filling, so I thought to myself (anyone else think of "A Wonderful World"??), what else can I do with these apples?


And then this happened.  Plus ten for Anika. Also to get the basket shape you need muffins pans. It's not actually an ingredient but a tool, which is why I'm awkwardly letting you know here.


Apple Baskets

Makes 12 apple baskets

1/4 cup melted butter
1 1/2 cups chopped, peeled green apples
1/4 tablespoons sugar
1/2 teaspoon ground cinnamon
1/2 cup chopped walnuts
4 phyllo sheets, thawed

1. Preheat oven to 350 degrees Fahrenheit

2. Separate each phyllo sheet and brush with the melted butter. Lay the buttered sheets on top of each other until all four sheets are stacked up evenly. Phyllo sheets dry out really easily so cover with a damp towel when you aren't attending to them.

3. Cut the phyllo sheet evenly into 12 squares/rectangles and press into the muffin cups. They don't have to fit perfectly and if there is a lot of phyllo hanging off the muffin cup, trim it down so the phyllo sheets actually fit. I also don't think I'm explaining this step clearly so check out this phyllo cup tutorial that I Googled that has step by step pictures! Also in this recipe we bake the phyllo cups with the filling at the same time, and it produces the same result.

4. To prepare the apple mixture, combine the sugar, apples, walnuts, and cinnamon in a medium sized bowl. Toss well so the apples are evenly coated.

5. Place a heaping spoonful of the apple mixture into each pastry cup.

6. And now you can bake them until light golden brown and crisp (approx. 10-15 minutes)! Serve immediately. 

TIPS:

I noticed the longer I kept them out after the baskets were baked, the soggier they became. So eat them when they pop out of the oven!! I also ate mine with vanilla ice cream because there is something about cinammon-y apples that just calls for vanilla ice cream.  You don't have to of course, but just thought I'd discretely implant the idea in your head. Don't worry the ice cream was your original idea.

Thursday, October 17, 2013

Sinning Siracha & Godly Garlic Kale Chips

For those of you wondering, can kale actually become even more awesome than a potato chip? The answer is yes. My roommate who does not eat ANYTHING green, and I'm not even exaggerating here, even she LIKED the kale chips. She ate more than one. I swear it was a miracle because this girl runs away just at the sight of veggies.

A friend back home actually requested that I experiment trying kale chips, the new and improved potato chip trend. And for those of you now wondering,  I do take requests. But you have to be special enough for me to actually honor your wishes. Mhmm, that's right. I have high standards.

Of cooourse I'm kidding.

Apparently I'm feeling sassy this morning so you're going to have to excuse my behavior. I'm always open to trying new recipes so email/text/comment/facebook/yell anything you want me to try.  Forreal guys and girls.

So I put on my thinking cap and walked over to my little bureau/pantry and looked for potential suitors for my kale chips. The garlic powder and siracha were the obvious winners so I made two different batches to see which seasoning I liked better!

In conclusion, I'm not sure which seasoning I liked better. Yup, I'm super helpful. The texture reminds me of the fragility of snowflake and the crunchiness of aluminum foil. Please don't go looking for such objects to eat. I really don't recommend doing so.  Flavor-wise, I don't think you can go wrong with garlicy goodness or siracha. So I would just say pick and choose your winner, or if you're indecisive like me, make em both!


Sinning Siracha Kale Chips

1 bunch kale
1 tablespoon olive oil
1 tablespoon siracha
Kosher salt (to taste)

Godly Garlic Kale Chips

1 bunch kale
1 tablespoon olive oil
2 teaspoons garlic powder

1. Preheat your oven to 300 degrees Farenheit.
2. Wash your kale thoroughly before tearing the leaves apart from the middle rib of the kale leaf.  The center stem doesn't crisp up too well, so you only want the leaves. Tear the leaves into bite size pieces, about the size of a regular potato chip!
3. Make sure to properly dry your leaves. This step is crucial so that your chips are super crisp when they come out of the oven.
4. Drizzle the kale with olive oil and sprinkle the seasoning salt. Mix well so the individual pieces are properly coated.
5. Line the kale in one single layer on a baking sheet, and make sure not to overcrowd the pieces! Bake for about 10 minutes, flip, and bake again for another 10 minutes or until the entire chip is crispy. Expect the siracha kale chips to take longer to bake (~ additional 5 minutes)

Tip:

I actually used two trays for one bunch of kale because the leaves themselves have a large surface area. Telltale signs that your kale chips are done are when they become edges shrink up and the chip becomes brown-ish.  Your chips might actually take longer to become crispy so don't freak out if they are in the oven longer than I suggested. Also, I personally finished all my kale chips within a day, so double or triple the recipe if you want to feed more than one hungry girl.

Tuesday, October 1, 2013

Vegetarian Bahn Mi

Yikes. It's been A WHOLE MONTH since I've posted here and I'm really really really sorry. I honestly didn't forget but who knew 18 credits, two jobs, and various clubs would be so much work?!? And yes, I'm resorting to excuses so you'll pardon my unacceptable behavior. 

Anyways, this is a post that I've been dying to write because of how awesome the end product looks and tastes. It all started out when a friend texted me that he had just eaten some delicious banh mi. I had no idea what he was talking about, so I googled the recipe to educate myself on this traditional Vietnamese sandwich. Within the next hour I was on my way to the grocery store to pick up the necessary ingredients. Aaaaand the rest is history. 


Banh mi is a French-Vietnamese street-food, fusion sandwich that is made on a crisp baguette with picked veggies, cilantro, cold cuts, a Vietnamese mayo, and drizzled with soy sauce. Phew, I tried to pack a lot in that sandwich. I actually meant to type sentence, but I'm just going to leave it cause we can both chuckle at my typo together. Since I've never had an authentic bahn mi, or any type of bahn mi, I can't guarantee that my recipe is the classic. I did do some research so I know I'm not too far off, but what I can guarantee is that it is freaking awesome!!

What did I change? Well obviously I made a vegetarian version so I substituted egg instead of the most common filling, pork. I'm a huge lover of pickled things, so I pickled my carrots AND cucumber.  I actually tried pickling my carrots and cucumbers with honey and the cucumbers with sugar to add different tones of sweetness to my sandwich. Double the yummy-ness. I forgot to buy daikon, and the next time I make it, I'll definitely add pickled julienned daikon radish! I also added the cherry tomatoes and lettuce because I like my sandwiches to have a lot of filling. 

Also before you start reading the actual recipe, let's take this moment to drool over the pictures together. 


Vegetarian Banh Mi

Serving Size: Three sandwiches

1 French Baguette, halved
1/2 cup shredded carrots
1/2 cup thinly sliced English cucumber 
1/2 cup rice wine vinegar
1 tablespoon honey
1 tablespoon red pepper flakes 
2 tablespoons sugar
3 eggs 
4 romaine lettuce leaves
1/2 cup cherry tomatoes, halved
Fresh cilantro
Soy Sauce
1/4 cup Mayo
1 tablespoon Siracha*
EVOO
Salt & Pepper


1. Preheat the oven to 350 degrees Farenheit. Once at desired temperature, place the halved french baguette on a baking sheet to toast. Let the baguette crisup up for approx 4-5 minutes and then cool for an additional 2 minutes before adding the toppings.
2. Place 1/2 peeled and shredded carrots, 1/4 cup rice wine vinegar, 1 tablespoon honey, and red pepper flakes in a small bowl. Mix well and let sit for a minimum of  20 minutes before serving. 
3. In a separate bowl, mix 1/4 cup rice wine vinegar, thinly sliced cucumbers, and sugar and let the pickling begin! Once again let the cucumbers pickle for at least 20 minutes before assembling the sandwich.
4. Crack your eggs, and beat with a pinch of salt and pepper. Make three individual omelets in a small saucepan and make sure to use EVOO to coat the pan so the eggs slide right off! 
5. To make your siracha mayo, simply mix together the mayonnaise and the siracha. It's as easy as it sounds. Also if you want it less spicy don't add the full tablespoon of the siracha. 
6. Now take the toasted bread and cut the full  length of the bread into thirds. On each individual side apply the siracha mayo and drizzle the soy sauce. Lay down the lettuce, cherry tomatoes, and  individual omelet on each sandwich. Now it's time to add the fancy toppings. Make sure to remove any excess liquid from the cucumbers and carrots before adding the pickled vegetables to your sandwich. Finally add fresh sprigs of cilantro before pressing the top half of baguette on the sandwich to seal the deal :)

Tip:

I would suggest doing the pickling (especially the cucumbers) several hours before serving. I did mine overnight so when it was time to assemble the sandwich, I was done in minutes.  I made note of this in the instructions as well, but if the mayo is too spicy, cut down on the amount of siracha you add. It packs a lot of heat in a small bite.

P.S. I also pickled onions with my cucumbers just for the heck of it. And you'll notice in my pictures I accidentally photographed parsley instead of the cilantro. Whoopsy daisy. At least I realized my error before it was time to eat!!

Sunday, August 25, 2013

Apple Turnovers


My garden at home has a large, bountiful green apple tree and every year we get tons of fruit. We try to spread the wealth as much as possible but realistically some fruit goes to waste. Being the resourceful person I am, I decided to take the leftover fruit and cook em! This is the first in my series of apple desserts :)

I love tart apples so I didn't use too much sugar when I baked my turnovers.  The cinnamon sugar on top makes the perfect balance between tart and sweet! I also made my turnovers rectangular simply because it was easier to roll out. Thinly slice your apples because if the apples are too chunky they will not fully cook through. My final suggestion is to serve the turnovers warm with ice cream :D Cause honestly, every warm apple dessert tastes a million times better with a classic vanilla ice cream.


Apple Turnovers

Serving Size: 8 turnovers

1 package (17.3 ounces) puff pastry sheets, thawed
1 1/2 cups chopped, peeled green apples
1/4 cup sugar
1/2 teaspoon ground cinnamon
1/2 cup chopped walnuts
Water & Flour

TOPPING:
2 tablespoons butter, melted
1 tablespoon sugar
1 teaspoon ground cinnamon

1. In a large bowl, combine the sugar, apples, walnuts, and cinnamon. Toss well so the apples are evenly coated.
2. On a lightly floured surface roll out eat pastry sheet to half of the original thickness. Cut each individual sheet into four squares for a total of 8 turnovers. 
3. Spoon the apple mixture  into the center of each rectangle. Dip your fingers in water and with your wet fingers trace the border of the puff pastry sheet. (The water helps seal the pastry sheet!)
4.  Fold the rectangle in half and press edges to seal. To make the edges pretty, you can use a fork to crimp corners of the pastry.
5. In a small bowl, stir the ground cinnamon and sugar. Brush the pastries with the melted butter and liberally sprinkle the sugar cinnamon mixture. Place turnovers on a lightly greased baking sheet and bake at 400 degrees until golden brown (approx. 12-15 minutes).

Monday, August 19, 2013

Oven Baked Garlic Sweet Potato Fries with Feta Yogurt Dip

I have been experimenting all summer long to perfect oven baked sweet potato fries. And I think I might have finally come close with this recipe. The dip was inspired by my favorite food blogger and you can find her take on these fries here, but I personally like my tweaks better. Then again I may be a little biased but you really  won't go wrong with these perfectly crispy fries accompanied by the creaminess of the feta yogurt dip.

Through my experimentation I discovered several things: 
1) I'm not a huge fan of using butter on my fries and prefer to use vegetable oil to coat the potatoes. I find the butter to be a little heavier and I like to think these fries of a healthy snack. But honestly, butter does make your potatoes richer so feel free to sub in butter instead of oil!

2) Stick your cookie sheet in the oven while it's preheating. That way you will hear a nice sizzle when you put the potatoes in and you will get an awesome sear on the outside.

3) Having too little or too much oil is a bad thing when it comes to baking fries. With too little oil your fries don't get crispy, but too buttery and your fries get greasy.

4) I like to steam my potatoes so they are al dente when I stick them in the oven. Steaming them with Ziploc steam bags takes two minutes and that way you don't have to stick them in the oven for a long time.

In my opinion, my go-to college midnight snack!


Garlic Sweet Potato Fries

2 large sweet potatoes, peeled (if desired) and sliced into thin 1/2-inch (thick) strips
2 tablespoons olive oil
3 garlic cloves, minced
1/2 teaspoon paprika
1/2 teaspoon salt
1/2 teaspoon pepper
3 tablespoons freshly chopped parsley

Feta Yogurt Dip

3 ounces crumbled feta
1/3 cup greek yogurt
1/2 teaspoon salt
1/4 teaspoon pepper
1/2 teaspoon smoked paprika
1/4 teaspoon garlic powder

1. Preheat oven to 425 degrees F and place a cookie sheet in the oven while it is preheating.

2. Take the sweet potatoes and cut them into 1/2 inch think strips. In a large bowl toss well with olive oil, garlic, paprika, salt, and pepper. Make sure the sweet potatoes are evenly coated with oil.

3. Once oven is preheated, spread sweet potatoes out in a single layer on the cookie sheet. Bake for 5 minutes, remove and flip, and bake for another 5 minute. Depending on how well you cooked the potatoes before baking, you may have to cook for a longer or shorter amount of time. Essentially pull the fries out when they are fully cooked through.

4. Once cooked, remove the fries and add parsley tossing to coat. Serve with the creamy feta dip!

For the dip:
1. Combine all ingredients together and mix well. Ta-da!!

Monday, August 12, 2013

Hot Chocolate Brownie S'mores Pie

Extraordinary. That's what a friend told me when he took a big bite out of this pie. He showed all the symptoms of a foodgasm: his eyes rolled to the back of his head and he became weak in the knees.  Believe me, I couldn't have asked for a better reaction. 

This weekend was also apparently national s'mores week so  I decided to celebrate with brownies, hot chocolate, marshmallows, and graham crackers all bundled up into one. I'm not entirely sure who declares these "national holidays" but I'm not complaining. And neither should you if you decide to eat my interpretation of the classic s'more. 

I also am really, really, really sad to say that I don't have pictures of my final product. Just as I was taking my brownie s'mores pie out of the broiler till the marshmallows got nice and toasty, it fell. I stood there horrified for a good ten seconds staring at my beautiful, broken pie. But I ate it anyways because seriously, this pie was too good to just throw away. #clumsyhungrygirlprobs 

Also I feel like I should mention that it fell on my countertop, before you imagine that I'm a terrible friend for letting others eat it off the floor. 

Summary of this story: EAT SOME HOT CHOCOLATE BROWNIE S'MORES PIE. 


Hot Chocolate Brownie S'mores Pie

1 graham cookie pie crust 
1/2 cup butter, melted
1 cup white sugar
2 eggs
1/2 cup all purpose flour
1/3 cup unsweetened cocoa powder
3 tablespoons hot chocolate
1/4 teaspoon salt
1/4 teaspoon baking powder
1 teaspoon vanilla
1 cup marshmallows


1. Preheat oven to 350 degrees. 
2.  In a large bowl add the flour, sugar, cocoa powder, hot chocolate, baking powder, and salt. Sift the ingredients if needed to remove any large lumps. 
3. To the dry ingredients beat in the eggs one at a time and add the melted butter and vanilla. 
4. Pour brownie mixture into pre-made graham cracker crust. 
4. Bake approximately 25-30 minutes(check with a toothpick or fork). 
5. Once the brownie is fully cooked through, take out of the oven and top with the marshmallows. Bake in the oven for an additional 3 minutes until marshmallows are gooey. If the marshmallows aren't toasted, stick the pie under the broiler for another minute to get the desired brown color. 


Tip:

The next time I make this pie in college, I'm not going to bother making the brownies from scratch. I plan on using a pre-packaged brownie mix and just adding in my favorite hot chocolate powder!

Wednesday, August 7, 2013

Homemade Baked Falafel

This whole Middle-Eastern trend is inspired by a visit I made to to a local bakery.  You know how fresh bread smell is irresistible? Well I was lured by the smell of this freshly made pita and couldn't resist picking up a pack. 

And then I thought to myself, this pita is world-class. It needs to be treated right. Which is why I decided to make falafel to accompany my scrumptious, fluffy, pita bread.


Traditionally falafel is deep-fried but to cut a lot of calories I wanted to bake them! I knew I could get a nice crust in the oven finished with a seared brown color under the broiler. I then got a bit carried away and made both tzatziki AND tahini from scratch. Check out my tzatziki and tahini recipe HERE! Seriously, a superhero is as important as his/her sidekicks. AKA you have to try one or more of these sauces when you make falafel. 

I made this recipe harder for myself because I soaked my garbanzo beans overnight, pressure cooked them, and then mashed them. I should have taken the easy way out and used canned beans. There's always next time I guess.  

Here's a three step summary of how to make falafel: 

1. Mash chickpeas
2. Mix spices and seasonings.
3. Bake.

Super college-friendly, and if you make bigger patties you can eat them in burgers! I doubled the recipe because I'm saving some falafel to eat on top of my salad. Falafels cook fast, are effortless, and versatile! And I'm totally digging my sauces. 


Homemade Baked Falafel

1 15-19 oz can chickpeas, drained
1/2 onion, chopped
2 cloves of garlic, minced
3 tablespoons fresh parsley, chopped
2 tablespoons all purpose flour
2 teaspoon coriander
2 teaspoon cumin
1/2 teaspoon chili powder
1 tablespoon olive oil
1 tablespoon lemon juice
1/2 teaspoon salt
1/2 teaspoon pepper


1. Preheat oven to 400 degrees. 

2. In a large bowl mash drained chickpeas by hand with a fork, spoon, potato masher. Using a blender will make the mixture very thin, as opposed to a chunky but paste-like consistency.

3. Add remaining ingredients and combine well. At this point you should be able to form into two-inch patties. If the mixture is too dry add a a tablespoon of water, and if it's too runny and falls apart, add additional flour.

4. Place on lightly greased baking sheet and bake for 5 minutes or until lightly browned, flip the falafel, and bake for another 5 minutes. To get desired brown color on top, broil each side for 2 minutes.

Tips:

Best served with tahini, tzatziki, or hummus in pita bread with fresh veggies. Check out my recipes for tzatziki and tahini HERE!

Tahini + Tzatziki

To educate some of ya'll, tzatzki is essentially a tangy, cucumber yogurt dip. Tahini is a paste of sesame seeds and olive oil and is used as a base for many Middle Eastern dishes such as hummus, baba ghanoush, etc. I served both of these sauces together with my baked falafel and they were the BOMB. 


Tzatziki


1 cup plain yogurt 
1/2 english cucumber
1 tablespoon olive oil
1 tablespoon vinegar
1 garlic clove, minced
2 teaspoons lemon juice
1/2 tsp. salt
1/2 tsp. pepper


1. In a mixing bowl, combine all ingredients and blend thoroughly. Serve chilled. 


Tahini Sauce

Yields approximately 1/2 cup

1/4 cup sesame seeds
1 teaspoon olive oil
1/2 teaspoon salt
1/3 cup water

1. Toast sesame seeds in pan until lightly browned and fragrant. Remove from heat and grind with remaining ingredients in a blender until smooth. 

Tips:
Tzatziki usually calls for fresh dill, so add a tablespoon in your dip if you have some! I unfortunately had an abundance of mint, so I chopped up five leaves and added that to my tzatziki. Fresh herbs make a difference so use them if you have em!

Back in Hotlanta

So I know it's been a week since I've posted on my food blog, but I promise I haven't forgotten! It's just been super hectic because I left for college on Saturday and have been traveling, moving in, or going to training every since. Sometimes it really sucks to be out-of-state and having to move in, but on the bright side, my room is now fully furnished! I still have to put up all my wall decorations and lights but here's a sneak peek at the before and after:

BEFORE


AFTER


Okay DO YOU SEE HOW BIG MY ROOM IS?! I even have two beds :) And to make up for my lack of posts, here's a double post for tonight.

Tuesday, July 30, 2013

White Chocolate Oreo Cheesecake


Okay, so I'm cheating a bit here because I haven't made this recently but it's NATIONAL CHEESECAKE DAY!! It would be sinful if I didn't post my favorite go-to cheesecake recipe on this holiday, and plus, it's my favorite dessert. Not only would it be sinful I didn't post this, but it's also sinful if YOU don't try the recipe. It's so sinfully delicious. I've said sinful five times so I really hope I'm getting through to you. This recipe is a winner even though the pictures don't do it justice. 

White Chocolate Oreo Cheesecake

Recipe adapted from Kraft 

Half packet of Oreo Cookies (approx. 15 cookies)
2 tablespoons butter
1/4 cup white chocolate chips, melted
1 teaspoon lemon zest
1 lb. softened cream cheese, 16 ounces
1/2 cup sugar
1 tsp. vanilla
2 eggs


1. Preheat oven to 350 degrees F.

2. In a food processor crumble Oreo cookies until finely ground. To make the crust, mix the cookie crumbs and melted butter together until evenly moistened. Press the cookie crust mixture into the bottom of a square pan until firmly packed. The oreo filling will also act as a binding agent to hold the crust together.

3. In a separate large bowl combine cream cheese, sugar, vanilla, lemon zest, and the melted white chocolate and beat together. Add eggs in one at a time, and continue to beat slowly until combined.

4. Spread cheesecake mixture over crust and bake for approximately 25 minutes until cheesecake is firm in the center.

5. Let the cheesecake cool before putting it in the refrigerator for 2-3 hours.

Tips:

You really can guesstimate with the amount of white chocolate you put in, but keep in mind the more chocolate you put in, the sweeter it will be. Now there are several ways you to tell if this cheesecake is done: 1) you stick a toothpick in the middle and see if it's firm. 2) the cheesecake should just be pulling away from the sides. 3) it should be nice and puffy! 4) if you see any cracks and it starting to brown, pull that sucker out! The cheesecake will firm up when you let it cool.  Also, make sure you bake your cheesecake in a SQUARE baking dish. The problem with using rectangular baking pans is that the center of the cheesecake doesn't fully cook through. Happy baking! :)

Sunday, July 28, 2013

Momma's Mango Lassi

I actually made this a while ago, but I've been behind on updating all my recipes. For those of you have no idea what Mango Lassi is, it's a traditional Indian mango smoothie. It's deliciously creamy and is perfect for summer weather. My Mom is the one who taught me this recipe, and as ya'll know, Momma knows best!

And the best part about this drink is that it's embarrassingly easy to make with only three ingredients! (Four, if you count the additional sugar for taste.) Look down and you'll notice that this recipe only has 1 step. Can I get a hallelujah?

Mango Lassi

Makes 2 servings

1 sweet ripe mango, peeled and diced
1 1/2 cup buttermilk
1/2 cup ice
1 tablespoon sugar (to taste)

1. Take the peeled, diced mango and puree in the blender. Add the rest of the ingredients until the all the ice is crushed and it's your desired consistency.

Tips:

If the lassi is too thick add some water and blend well. Also, if the mango is not naturally super sweet then add the additional tablespoon of sugar to the lassi.

Friday, July 26, 2013

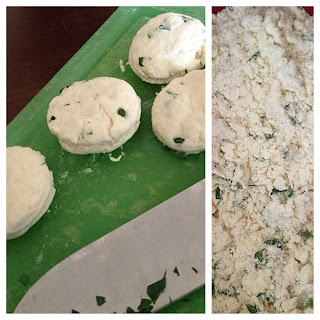
Mini Cream Cheese & Parsley Biscuits


During one of my many executions of English Sticky Toffee Pudding, I thought I didn't have enough flour to finish baking my cake. In my frantic search I found not only regular flour but self-rising flour.

After doing a quick google search (and reading the back of the packet) I found out that self-rising flour has salt and baking powder already added in its mixture. It's great for making things like scones or biscuits, which is why I decided to make some mini cream cheese and parsley biscuits!


According to this livestrong.com article, to substitute self-rising flour for regular flour you have to "Read the recipe to see how much baking powder and salt are required. If the amount is less than 1 1/2 tsp. of baking powder and 1/2 tsp. of salt per cup of flour, the substitution will not work well. ' If the ratios work, you will then "omit 1 1/2 tsp. of baking powder and 1/2 tsp. of salt for every cup of flour in the recipe. In most cases, this means you will not add baking powder or salt at all".


So although I used self-rising flour in my trial, you can use regular all-purpose flour with the additional salt and baking powder requirements! If I have confused you thoroughly, check out the original recipe which I made a twist on. 


Overall, this recipe was very simple: especially for a baked product. The size made them super appealing and I kept grabbing one to eat whenever I was on the go! The parsley adds some freshness and life to a normal buttermilk biscuit whilst the cream cheese makes the biscuit extra moist.


I made my biscuits a little bigger (2 inches in diameter) so I only ended up with 25 biscuits as opposed to 50. And you may think 24 is a lot, but right now there's high demand  for them within my family, and I only have a couple left! Who would have thunk these biscuits would be such a hit. 


Mini Cream Cheese & Parsley Biscuits

Recipe from How Sweet It Is
Serving Size: 2 inch biscuits in diameter- 25 biscuits  

2 cups self-rising flour
1/2 teaspoon baking soda
1/4 cup freshly chopped parsley
4 tablespoons cold unsalted butter, cut into piece
1/2 cup cold whipped cream cheese
3/4 cup buttermilk

1. Preheat oven to 450 degrees F.

2. In a large bowl, combine flour, baking powder and soda, salt and parsley, stirring well to coat. Using your hands, a fork or a pastry blender, add the butter and mix until coarse crumbles form. ( If you don't have a fancy machine like me, use your hands! It's the easiest way to control the consistency of the mix.)

3.  Once finished, add in the cream cheese in spoonfuls. Once again, use the same technique applied on the butter- but you don't want to mix the cream cheese in as much. Combine the mixture until there are a few larger chunks of cream cheese and it's worked into the flour.

4. Add the buttermilk and stir until it is JUST combined - do not overmix! 

5.  Add some flour to your workspace and place the dough on top.Roll out the dough and pat it into 1/2 inch thick. Take a small biscuit cutter or a (clean) lid to one of your spice containers and cut the biscuits into rounds. You want to use an instrument that is roughly two inches in diameter. 

6. Place biscuits on a nonstick baking sheet. Bake for 6-8 minutes, until slightly golden. These are best served warm when the cream cheese is still soft!

Tips:

 Make sure to flour your work station so the dough doesn't stick to your table! My advice to you is to watch your oven because these babies cook up REAL fast. One minute too long, and you could end up with blackened bottoms.  My personal serving suggestion is to eat them warm topped with butter. 

Wednesday, July 24, 2013

English Sticky Toffee Pudding

It was a regular Wednesday night, 9 pm to be exact, and I settled down on my couch (with my blankie of course)  to watch Masterchef. A friend had asked me earlier if I had seen everyone's reactions to Gordon Ramsay's sticky toffee pudding. I eagerly awaited the scene and you can see for yourself their reactions HERE.  I knew that I HAD to try the recipe, and the rest is history.

Words cannot even describe how I feel about this recipe. This cake is so darn delicious that I've made it on four separate occasions this past month. In fact, I think it might even tie with cheesecake as my favorite dessert. This cake will change your life.


I was surprised to learn that the cake has dates in it, which is what the brown stuff on my cutting board is. In the recipe you mix the roughly chopped dates with the baking soda & boiling water, and this causes the dates to soften and disintegrate. It resembled a date soup!

The easiest place to mess up making the cake is the finicky toffee. First, when you're cooking the toffee make sure that your flame is on low-medium heat. You want to watch and stir your sauce constantly until it becomes a medium brown color.  Once it reaches your desired color, take it off the heat and pour on top of your cake. My new oven actually has a broiler setting (YES!) but I'm pretty sure just sticking it in the oven for the toffee to become bubbly should do the trick. You stick the cake back in the oven for LESS than a minute AND WATCH IT THE ENTIRE TIME. Toffee/caramel burns just like that (insert me snapping my fingers) so you really need to watch it doesn't burn. I made that mistake the first time...

Your end product should be a super moist cake with a flaky, crunchy crust. The toffee should form a shell on the outside of the cake so you can hear it crunch when you cut into it. I would suggest eating right when it comes out of the oven, but otherwise just serve warm with a quenelle of ice cream.


English Sticky Toffee Pudding

Recipe modified from Marie Simmons's original posting.

1 cup plus 1 tablespoon all-purpose flour
1 teaspoon baking powder
3/4 cup pitted dates
1 1/4 cups boiling water
1 teaspoon baking soda
1/4 cup unsalted butter, softened
3/4 cup granulated sugar
1 large egg, lightly beaten
1 teaspoon vanilla
Vanilla Ice Cream (optional)

TOFFEE SAUCE:
1/4 cup unsalted butter
1/4 cup heavy cream
1/2 cup packed light brown sugar
1/2 cup heavy cream, whipped

1. Preheat oven to 350 degrees. Butter a 10-inch round or square baking dish. 

2. In a bowl of electric mixer beat the butter and sugar until light and fluffy. Add the egg and vanilla; beat until blended. Gradually beat in the flour and baking powder mixture.  ( If your flour and baking powder are lumpy sift before adding. 

3.  Roughly chop your dates & place in a small bowl. To your dates add the boiling water and baking soda; set aside. 

4. Add the warm-temperature date mixture to the batter and fold until blended with a rubber spatula. Pour into the prepared baking dish. 

5. Bake until pudding is set and firm on top, about 35 minutes. Remove from oven to a wire rack.

Toffee Sauce: 
1. Combine the butter, heavy cream and brown sugar in a small heavy saucepan; heat to boiling, stirring constantly. Boil gently over medium low heat until mixture is thickened, about 8 minutes. 

2. Preheat broiler. Spoon toffee sauce over the pudding and spread evenly on top. Place pudding under the broiler until the topping is bubbly, about 1 minute. Serve immediately spooned into dessert bowls. Drizzle with toffee sauce and top with a spoonful of of ice cream.

Tuesday, July 23, 2013

Quinoa with Mango and Curried Yogurt

My mom is on a restricted diet because of her health, and this motivated me to try out different gluten-free options! I've never cooked quinoa so I took it up as a challenge to make it as dinner for my family. 

Here's what I learned from cooking challenge: 

1. I actually love the taste of quinoa and you can cook it just like rice! It's simply another grain substitute so imagine rice but smaller, more tapioca like.  I'm actually going to buy a bag and take it with me to college.

2. There are three different ways you can cook the grain. You can cook in the microwave with the 2:1 water ratio, on a stove top,  or in a rice cooker! I chose the latter with the 2:1 ratio because I thought it was the easiest method. 

3. The recipe calls for WAY too much quinoa. I used only about half of what the original recipe called for and it still fed all three of us for dinner + we had leftovers. Don't worry the recipe I posted has all my modifications. 

4. I'm not sure how I feel about this recipe. I'm going to cook it again but I'm not in love with it. See that's my whole problem. I can't decide how I feel about it. My dad was not a fan of the recipe but that didn't surprise us much because he the only grain he likes is white rice. My mom and I liked the recipe but added some chili-garlic sauce for an extra kick and found that to really help the flavor. It definitely wasn't bad but not drool-worthy like my BBQ chicken paninis. Maybe we're just crazy because it has 4 forks on epicurious and 95% of people would make it again. 

Either way, I wanted to share my cooking-experiment and let you try and see for yourself! Plus, the quinoa was just screaming to be photographed. 


Quinoa with Mango and Curried Yogurt 

Modifications to Original Recipe from Epicurious.  Makes 4 servings or 6 side dishes. 

1/3 cup plain yogurt
1 tablespoon fresh lemon juice
2 teaspoons curry powder

3/4 teaspoon salt
1/4 teaspoon black pepper
2 tablespoons vegetable or peanut oil
1 1/2 cups COOKED quinoa or 3/4 cup uncooked quinoa
1 firm-ripe mango, peeled, pitted, and cut into 1/2-inch chunks
1 red bell pepper, cut into 1/4-inch dice
1 fresh jalapeno chile, seeded (if desired for less heat) and minced
1/3 cup chopped fresh mint
1/2 cup salted roasted peanuts (2 1/2 oz), chopped
Chili garlic sauce (optional)


1. Whisk together yogurt, lime juice, curry powder, salt, and pepper in a large bowl. Add oil in a slow stream, whisking until combined.
2.  Use a 2:1 water ratio to cook the quinoa. If uncooked use 3/4 cup uncooked quinoa and cook in a ricecooker.  Cook until fluffy and dry, 10-12 minutes. 
3. Toss quinoa with curried yogurt and remaining ingredients in a large bowl. Serve warm or at room temperature.

Monday, July 22, 2013

Creamy Garlic Alfredo with Broccoli, Parsley, and Fresh Roma Tomatoes

I had some leftover heavy cream from a cake that I made, and not having any other use for it, I decided to make alfredo for the first time! Alfredo takes less than ten minutes to make and you can start your pasta at the same time you get your sauce going. Making the alfredo was thankfully quick, and it had all the creamy, cheesy goodness you want from your classic sauce. 

Because alfredo is not the healthiest thing in the world, I decided to saute some veggies in the pan to add into my sauce. I used the same pan to cook my veggies, make the sauce, and combine all the ingredients together! I even served my alfredo straight out of the pan because I'm not a fan of doing dishes. Plus I conserved water and time, so no one's complaining :)

While making my alfredo I noticed that my cheese and sauce starting to separate so I quickly put in on low heat and stirred constantly so the ingredients melded together. The reason my ingredients started to separate was because I wasn't continuously whisking, so whisk your alfredo is my advice to you! Other than than my almost-going-to-be-a-problem, I had no other issues and found the recipe straightforward. 

Also if you want to make a this recipe gluten-free friendly just swap out the pasta for whatever gluten-free kind you prefer. I just chose penne because I already had a bag open!


Creamy Garlic Alfredo with Broccoli, Parsley, and Fresh Roma Tomatoes

Recipe adapted from Allrecipes.com & makes four servings. 

2 cups penne 
5 tablespoons butter
1 cup heavy cream
2 cloves garlic, minced
1/2 cup grated parmesan cheese
1/2 monterey jack cheese
1/4 cup chopped fresh parsley
1 cup chopped broccoli
1 roma tomato, diced

1. Bring a large pot of lightly salted water to a boil. Add the penne pasta and cook until tender, 8-10 minutes.  Strain water from pot of pasta to stop the pasta from cooking further. 

2.  Meanwhile, heat 1 tablespoon of butter in a skillet over medium heat. Place broccoli in the skillet and cooked until cooked through. Stir in the diced roma tomato and cook for an additional minute. Remove from heat and place in a separate bowl. 

3. In the clean skillet melt remaining butter over medium low heat. Add the cream and simmer for 5 minutes. Then add garlic and cheese and whisk quickly until heated through. Remove from heat and stir in parsley, broccoli, & tomato. 


See how easy this was? You can mix up your cheese and add whatever toppings you want (bacon sounds delicious).  Hope your alfredo experience was as fast and filling as mine :) Also, I didn't add a whole tbsp of butter to cook my broccoli so just use as much as you need!

Sunday, July 21, 2013

Fresh Peach Mint Lemonade

This recipe is frighteningly easy. In essence you are making regular lemonade and adding peach puree and mint. We had a whole bag of lemons, a whole bag of peaches, and mint growing rampant in my backyard so I thought why not?

And in this summer heat, my lemonade hit the spot. If you don't like mint/have mint then simply leave it out of the recipe! I guesstimated when typing up this recipe so adjust as necessary. 

Fresh Peach Mint Lemonade
Makes 2-3 cups of lemonade

5 tablespoons sugar
1 1/2 cups water
1 tablespoon lemon zest
1/2 cup lemon juice
1 peach 
Handful of mint leaves

1. Combine mint, sugar, lemon zest, and water in a small saucepan. Stir to dissolve sugar and cook on medium/low heat for approximately 5 minutes. (Cooking the simple syrup allows the mint leaves to steep flavor and the sugar to dissolve).
2. Remove from heat, strain the mint leaves, and let cool. 
3. Quarter the peach and puree in the food processor with the simple syrup mixture. 
4. Combine lemon juice with peach puree and simple syrup. Mix well and garnish with mint leaves or peach slices. 

Tips:

If you want the cop-out version (like I made) you don't have to to cook the simple syrup mixture. Just stir all the ingredients together in a large glass & make sure all your sugar is dissolved! The primary reason for heating up the lemonade is to bring out the mint flavor so without it the mint won't play a defining role. I just chopped up a couple of springs and ate them while drinking (A bit weird) so I could get the full effect without having to spend time heating it up. Click HERE for another peach mint lemonade recipe in case you want to make a pitcher's worth instead of a couple of glasses. 

Friday, July 19, 2013

Griddled Polenta Cakes with Caramelized Onions, Feta, and Honey


Sometimes I feel like I need a leash when I'm at Trader Joe's. I always end up buying something NOT on my grocery list. This time a pre-packaged roll of polenta caught my eye. It looks like this -->

I've cooked polenta from scratch before and was naturally curious if the pre-packaged roll tasted any different. If I could save time by just heating up the polenta, why not? I cut the polenta into 1/4 inch rounds and griddled them in a skillet! Super easy and super delicious. 

This recipe calls for caramelized onions which I've never made before & now I understand what all the hype is about!  I definitely google-d how to caramelize them and you can read too if you want: Click HERE for the advanced guide on how to bring out the natural sweetness of an onion. Otherwise, the instructions in the recipe should do :)

I was honestly really happy with the final result! The honey and sweet caramelized onions were a great balance to the tang of the crumbled feta on top. The original recipe calls for goat cheese (which is even tangier) so I can only imagine how nicely the flavors would play off each other. I got a nice sear on the cakes by using just a little bit of butter (EVOO works fine too) so the overall texture was really crisp with a softness once you cut in.  Overall, this recipe was scrumptious and easy to prepare!


Griddled Polenta Cakes with Caramelized Onions, Feta, and Honey 

Recipe Adapted from HERE (Courtesy of Arielle!)

1 roll of pre-packaged polenta
2 tablespoons butter
1 yellow onion sliced 
2 ounces crumbled feta
1/4 teaspoon salt
1/4 teaspoon pepper
Honey to drizzle 

1.  Add one tablespoon of butter to a heavy-bottomed skillet and set to medium/low heat. Add sliced onions and and cook, stirring occasionally until the onions are a golden in color. The natural sweetness of the onion should come through within 20-25 minutes of cooking. 

2. Bring large skillet to medium heat and place 1 tablespoon of butter to coat the pan. Cut the pre-made polenta into 1/4 inch disks and sprinkle with salt and pepper. After your pan is hot and lighlty coated with butter, place polenta disks into pan. You should hear crackling noise when you press down on the disks, otherwise your pan needs to be hotter. Cook polenta for approx. 3 minutes on each side until fully cooked through, and slightly browned on the outside.  Remove from heat and set aside.  

3. For final preparation, take the polenta cakes and place one tablespoon of caramelized onions on each one.  Top with crumbled feta and drizzle with honey. 

Tuesday, July 9, 2013

Back to the Basics: Salad

I know most people consider salads to be diet-food, bland, and boring. Although the former is really why my family started eating it in the first place, salads can really be yummy and fulfilling if you make them right! If you're looking to shed your freshman 15, or life's 50, then maybe you need to take a second look at the amount of calories you're consuming. After eating salad for lunch every day, EVERYONE in my family has lost weight. So maybe, just maybe, you should give our salad a try.


I consider salads to have 6 basic components: leaves, veggies, nuts, cheeses, meats, and a dressing. Of course I needed a diagram to illustrate my point because well, I couldn't help myself.


Below is a chart of some our favorite toppings & feel free to comment with whatever else you like to add in your salad! Our favorite salad dressing is Kraft's Toasted Sesame Asian but I also love Trader Joe's delicious vinaigrettes.